- Your cart is empty
- Continue shopping
-
Maven
- Posted on
- Categories:Family, Home
- 0 comments

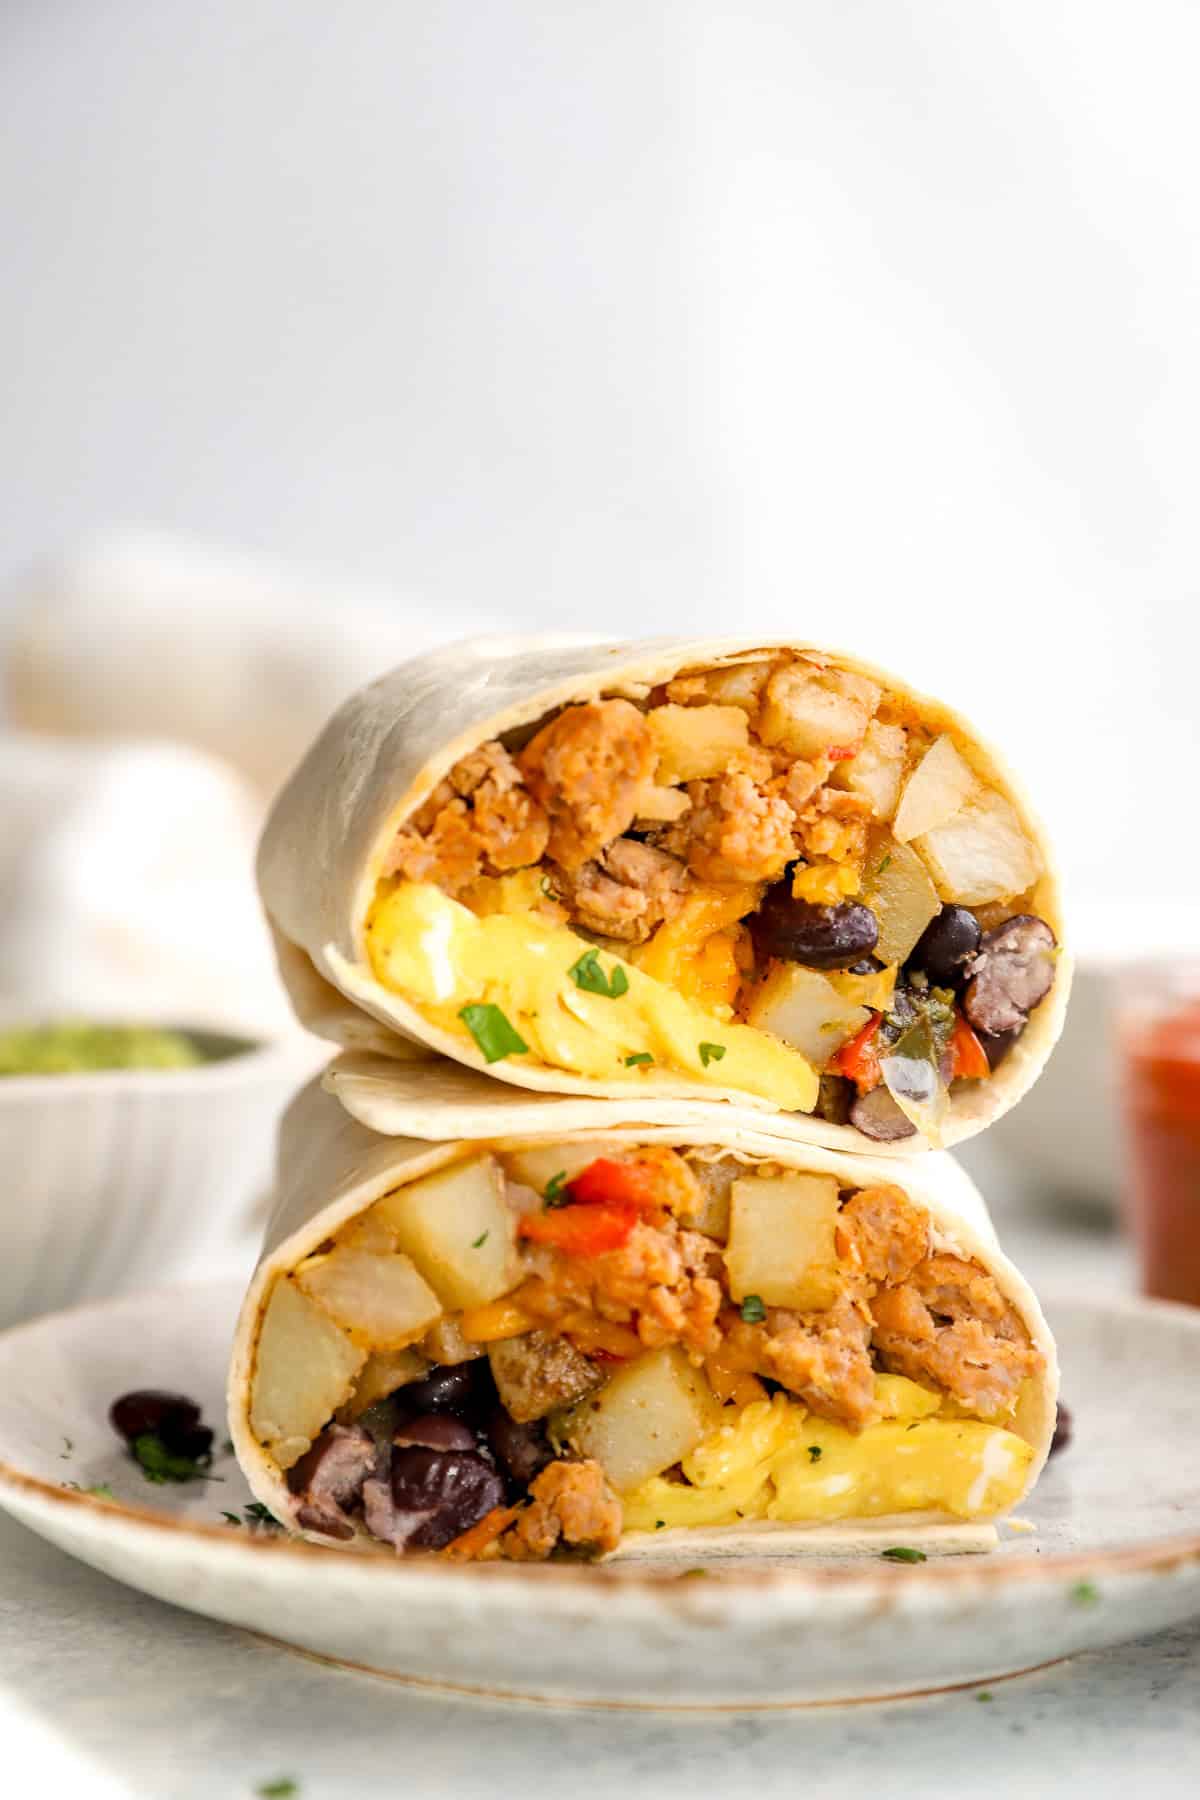
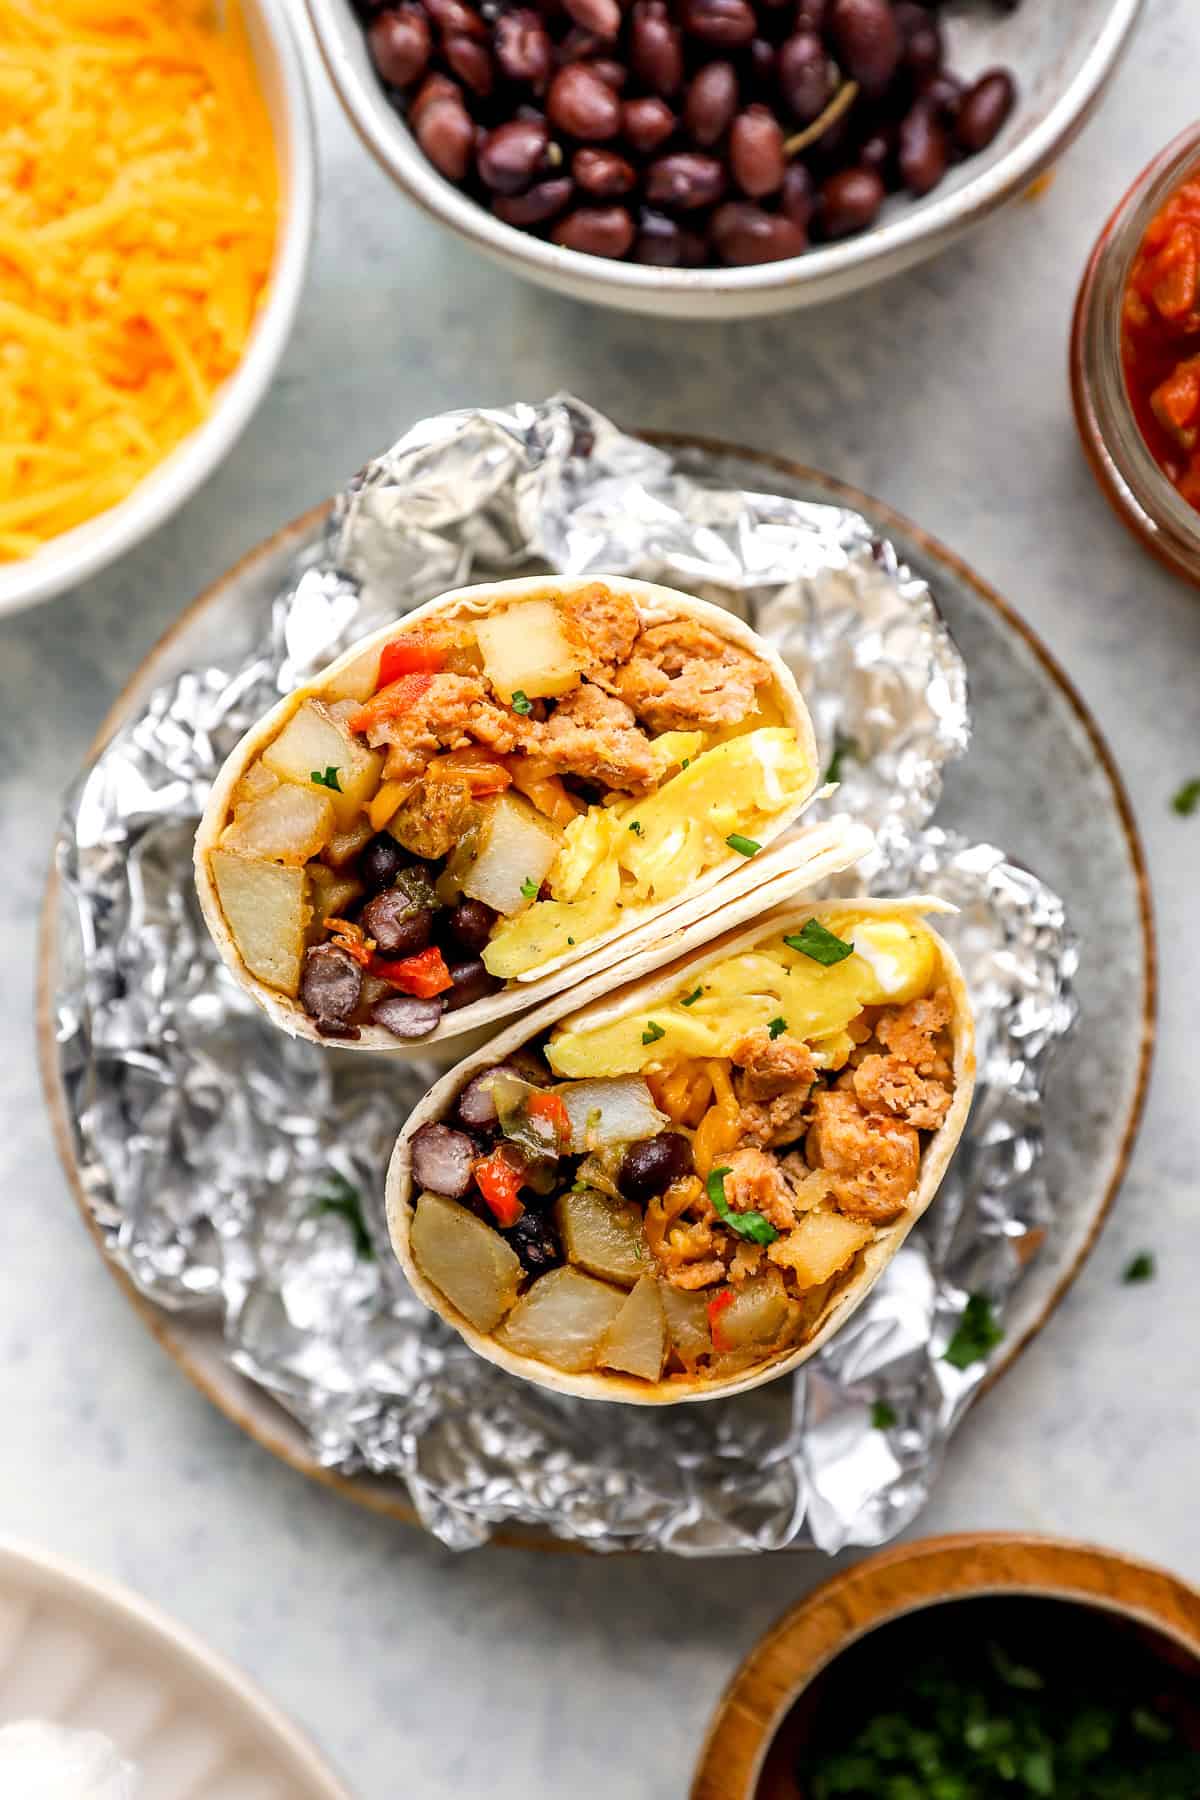
Breakfast just got easier, and more delicious. These Freezer-Friendly Breakfast Burritos are packed with protein, veggies, and flavor, and they store beautifully so you can grab one (or two) and go. Whether you’re meal prepping for the week or stocking your freezer for busy mornings, these burritos are a total game-changer, and you’ll be thanking yourself later.
Why You’ll Love These Breakfast Burritos
They’re naturally whole and wholesome, and easily tailored to your family’s tastes. Think fluffy eggs, savory sausage (or plant-based protein), melty cheese, and simple seasonings all wrapped in a soft tortilla and ready to heat in minutes anytime you need a satisfying breakfast at home or on the run.
These breakfast burritos are:
- Meal prep made simple: Make a batch in about 30 minutes and freeze for later.
- Perfect for busy mornings: Reheats quickly in the microwave or oven.
- Family-friendly: Easily customizable for picky eaters or dietary needs.
- Balanced & protein-rich: Great fuel to start your day strong.
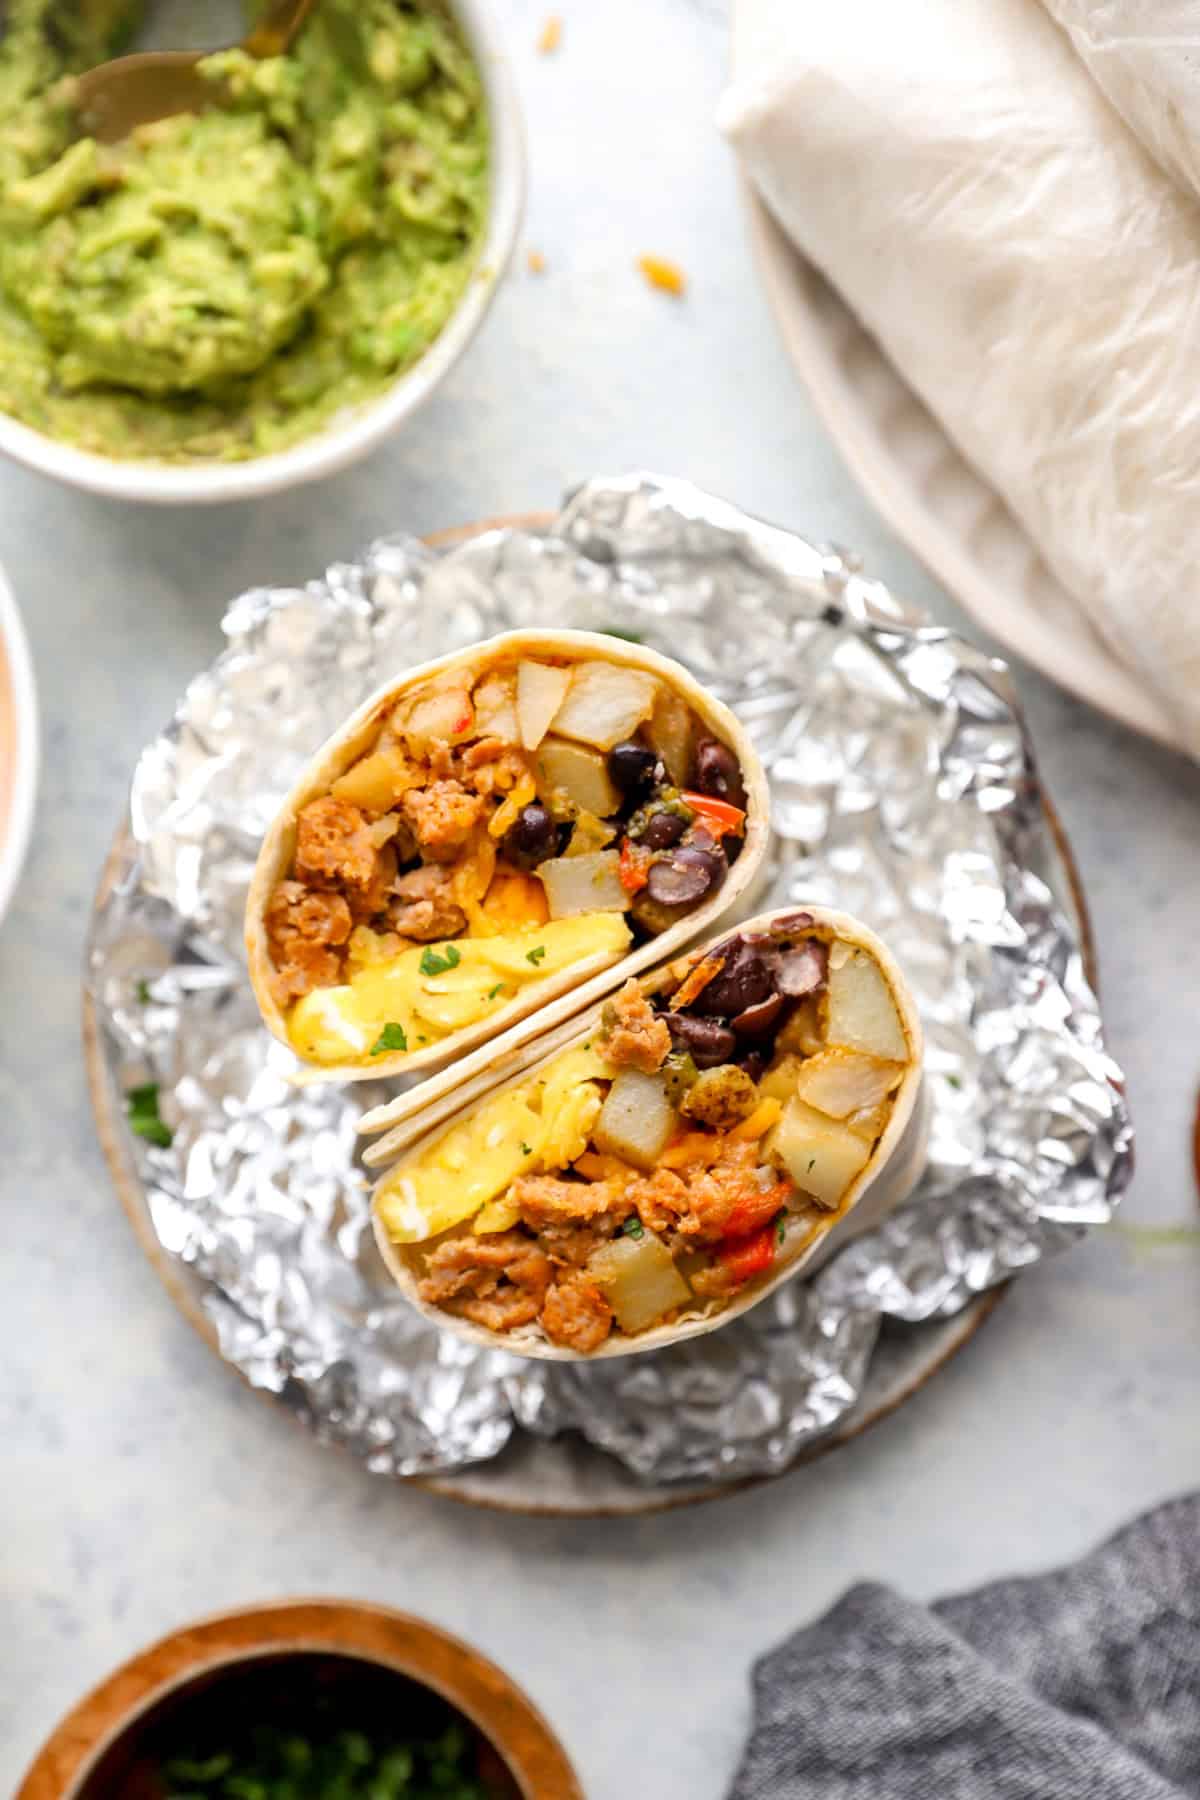
Serve them with salsa, avocado, or hot sauce for extra flavor. Trust me, once you make a batch of these, you’ll wonder how you ever lived without them.
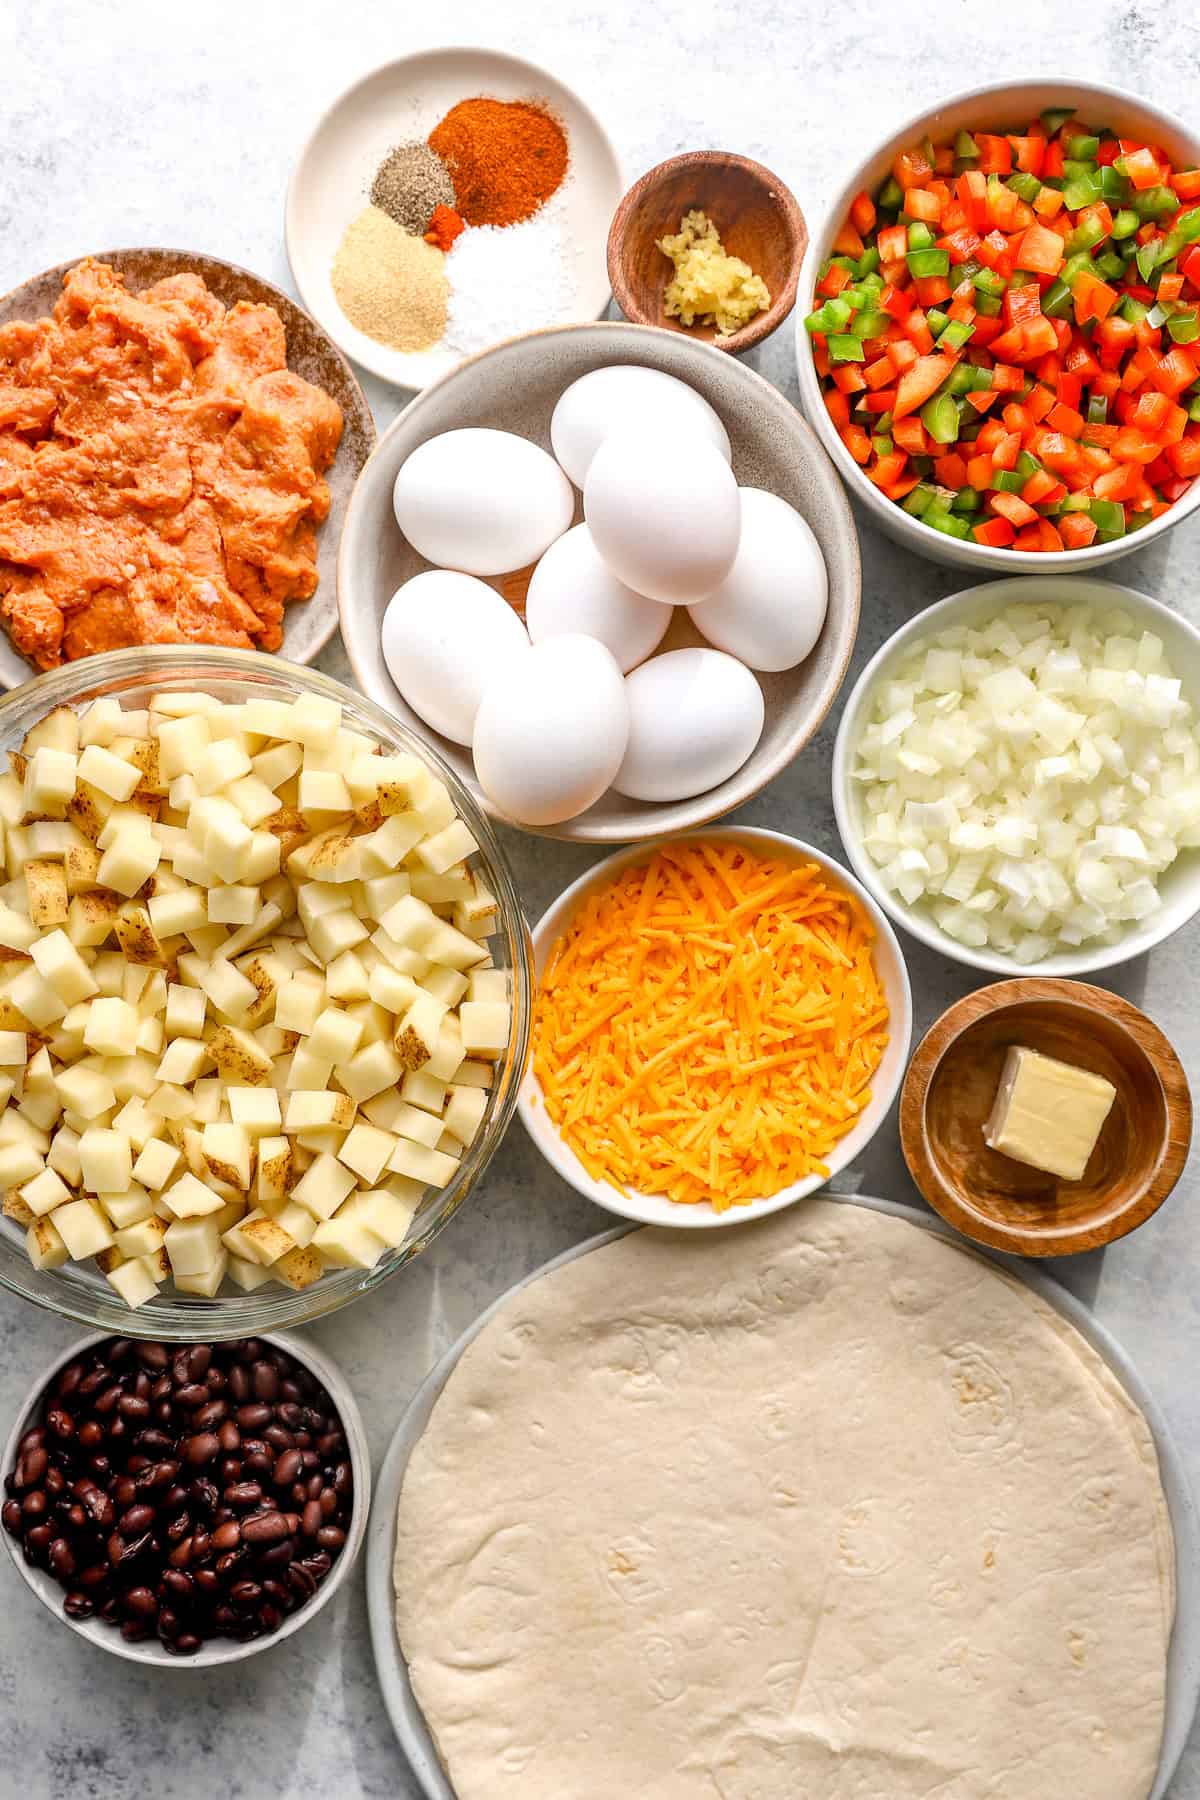
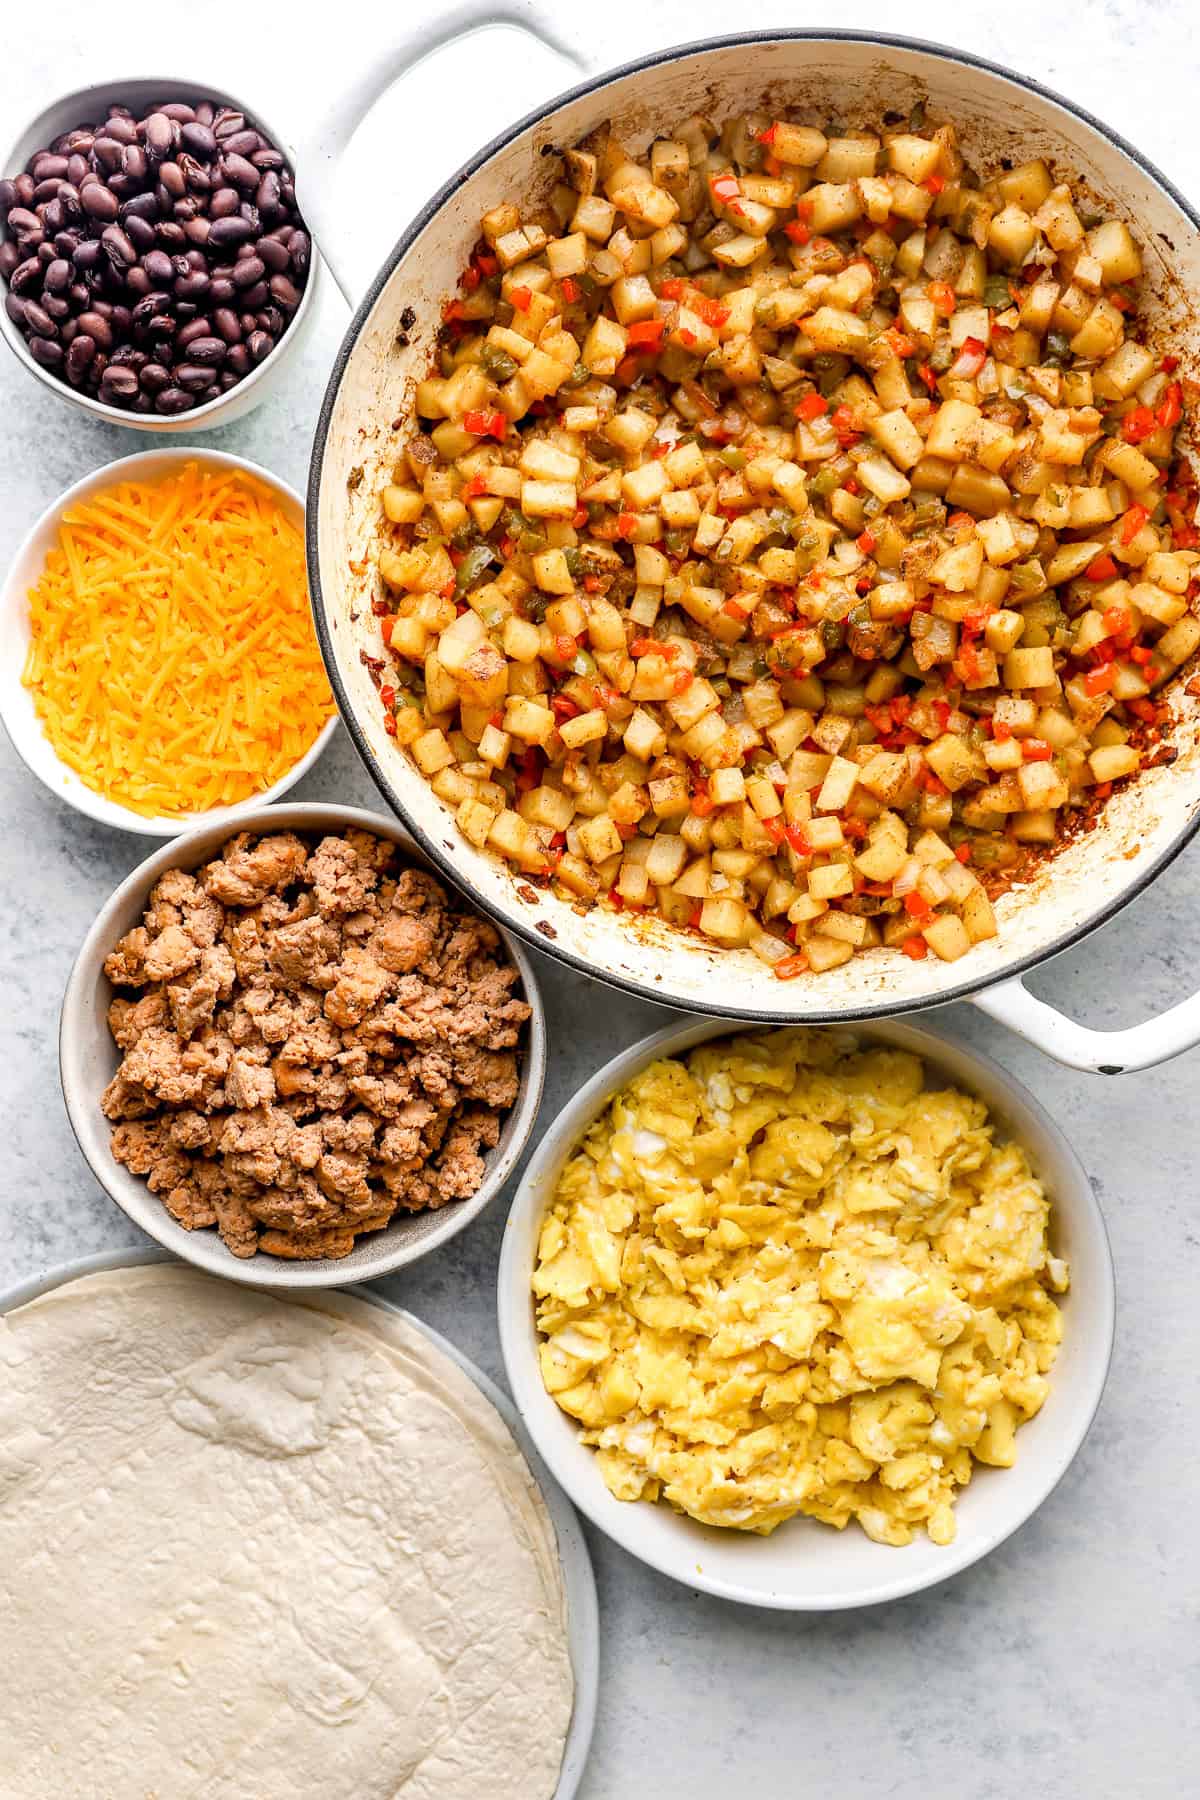
Ingredients Needed
*Scroll down to the recipe card for a complete list of ingredients and instructions!
Main Ingredients:
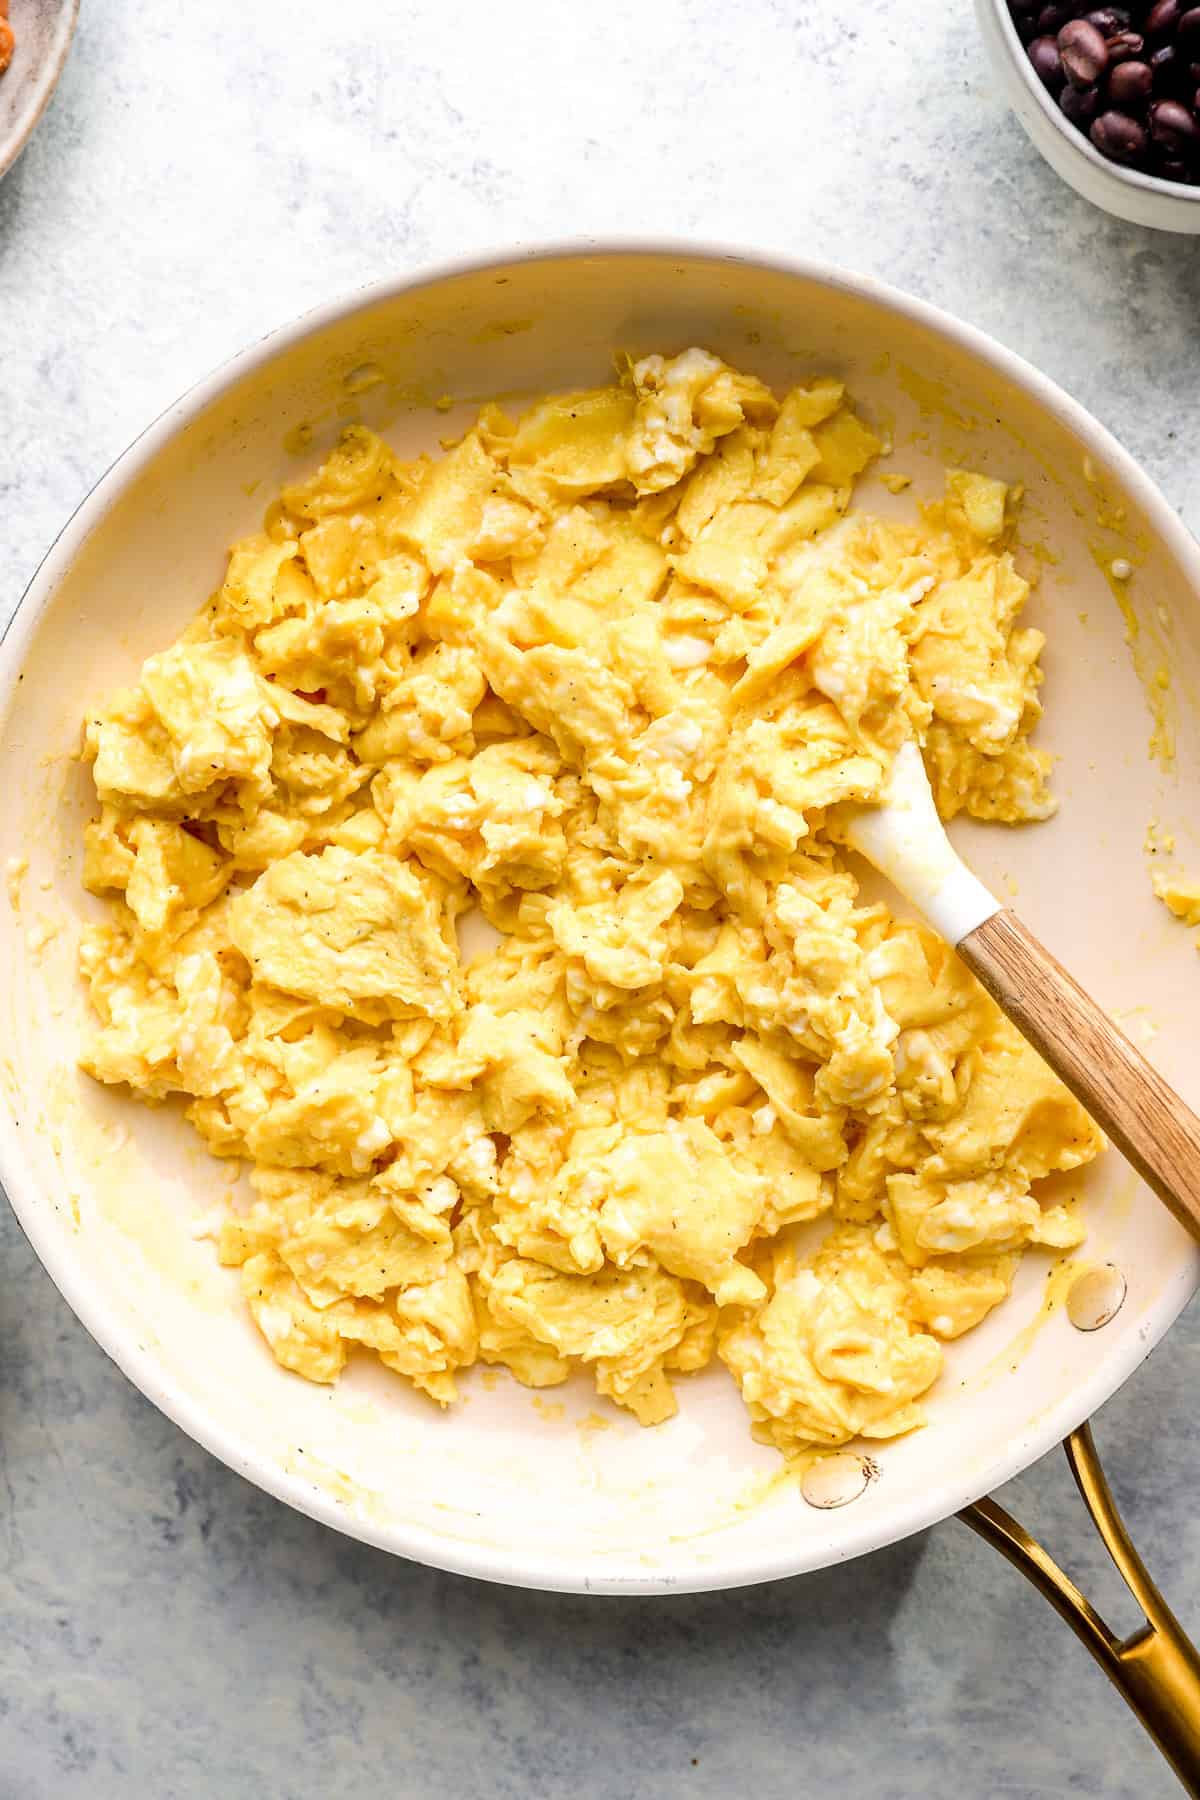
- Eggs: Scrambled eggs make the perfect breakfast burrito filling. You can also try my sheet-pan eggs for convenience.
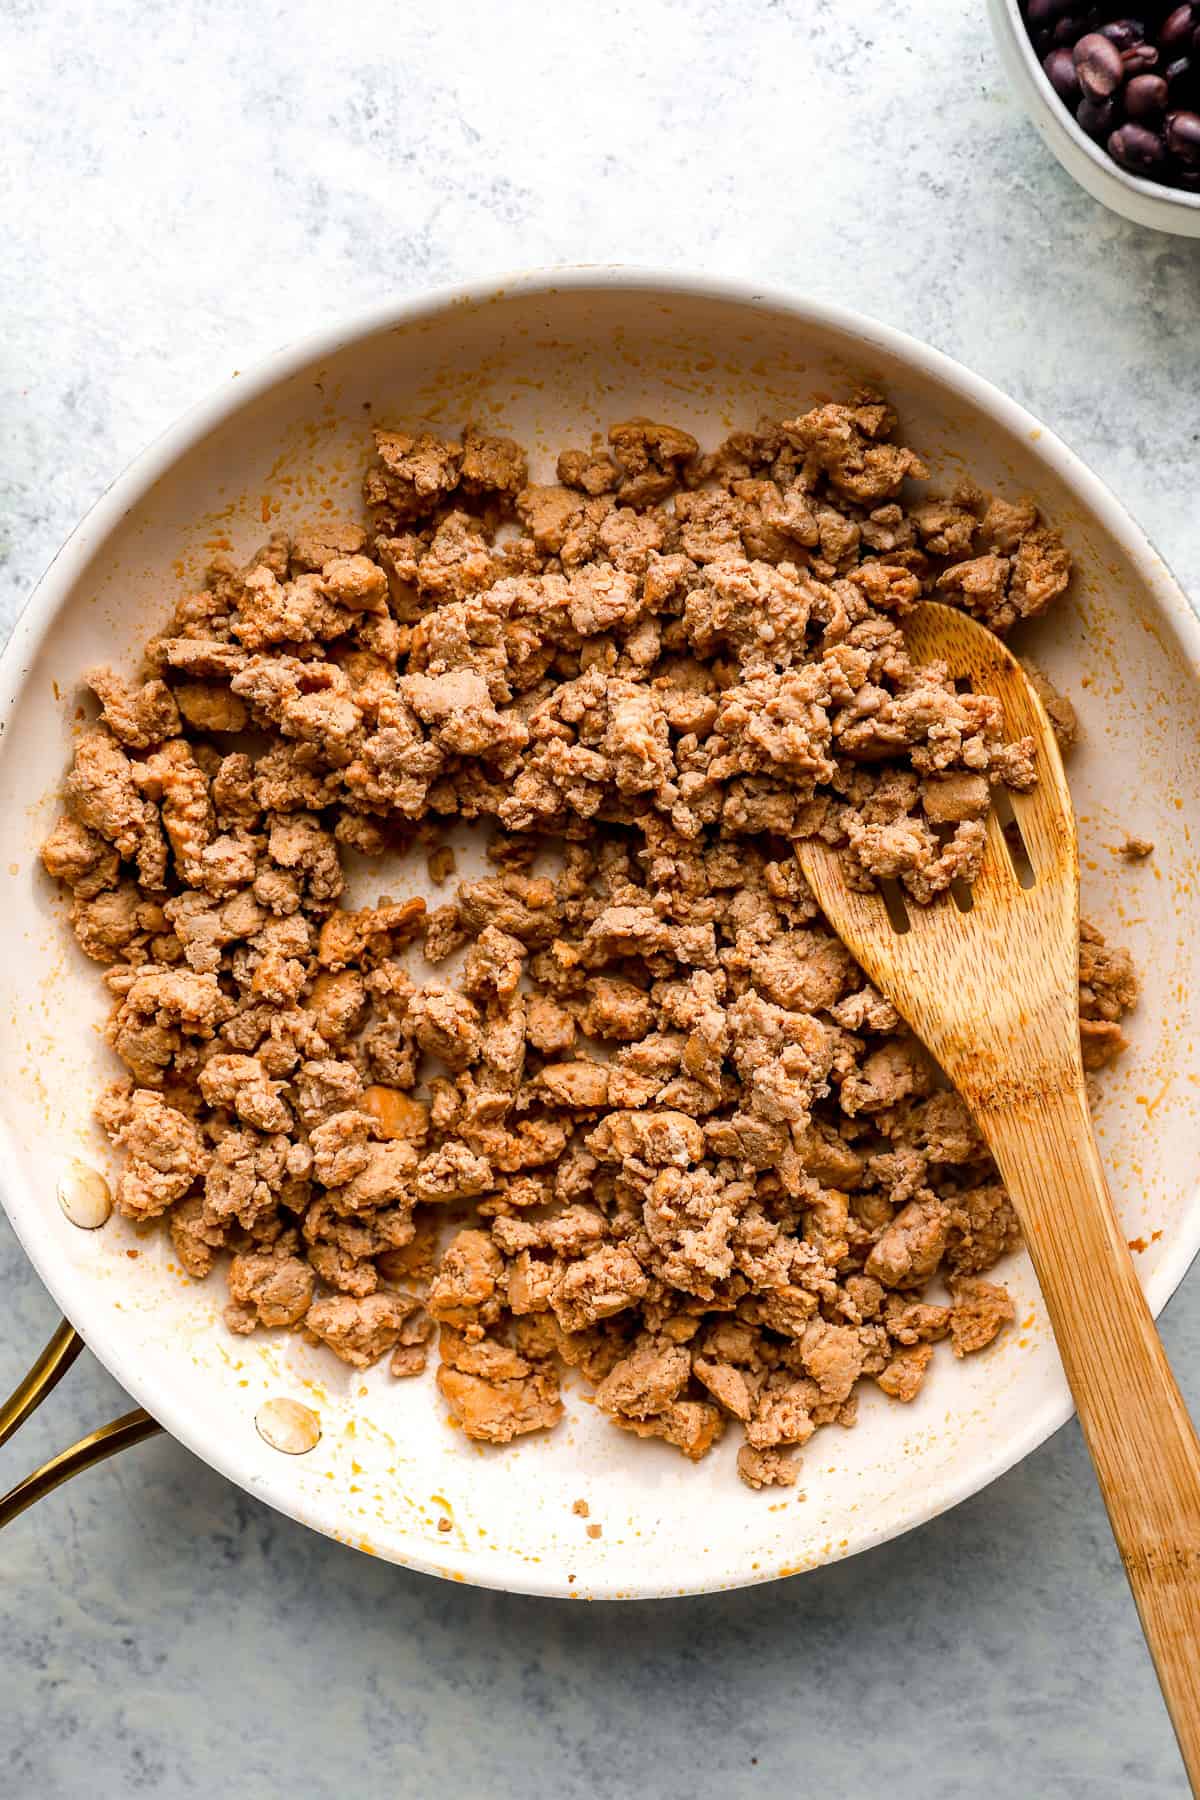
- Italian Sausage or Alternative: I use spicy Italian sausage, but use whatever variety of protein you prefer. Ground sausage works great here.
- Cheese: I prefer freshly grated cheddar, but any cheese is acceptable. Use your favorite! Pepper Jack is a great option if you want a little more spice.
- Beans: I prefer drained and rinsed canned black beans, but pinto beans work as well.
- Tortillas: Use large tortillas. The 10”-12” size works best for me!
Quick Home Fries:
- Ghee, Butter, or Oil: I prefer ghee for its rich flavor, but whatever you have on hand is fine.
- Garlic: As always, freshly minced garlic is the preferred option.
- Potatoes & Veggies (for quick home fries): I use a blend of onion, green bell pepper, red bell pepper, and russet potatoes. You can also make my Air Fryer Home Fries!
- Seasonings: A simple combination of garlic granules, paprika, sea salt, black pepper, and cayenne adds significant flavor to the filling.
Breakfast Burrito Variations:
The truth is, you can put just about anything you like in your breakfast burritos. The trick is to make sure that the filling isn’t too wet, or you’ll end up with soggy burritos.
Here are some other ideas for these freezer breakfast burritos:
Use another meat. Swap the Italian sausage out for diced ham, shredded chicken, chorizo, or breakfast sausage.
Add bacon. Cook the bacon on a sheet pan in the oven with the home fries, or fry it in a skillet! *bonus for multiple meats for extra protein.
Swap the potatoes. Swap the diced potatoes out for Cinnamon Roasted Sweet Potatoes, tater tots or shredded potatoes. Be sure to cook them first! Or toss in my Air Fryer Home Fries!
Spice them up. Give your burritos a kick of heat with diced jalapeño or green chiles. I love mixing these in with the scrambled eggs.
Add other add-ins! I like adding scallions and chopping them finely so they incorporate well into the filling.
Make them vegetarian. Leave out the meat and add more beans and vegetables!
How to Make a Breakfast Burrito
These make-ahead Freezer Breakfast Burritos are the ultimate freezer meal prep in my opinion. Think postpartum, helping a friend, you name it. Stock your freezer or anyone’s freezer, and provide them with the reheating instructions below. Truly, these frozen burritos are the ultimate make-ahead breakfast.
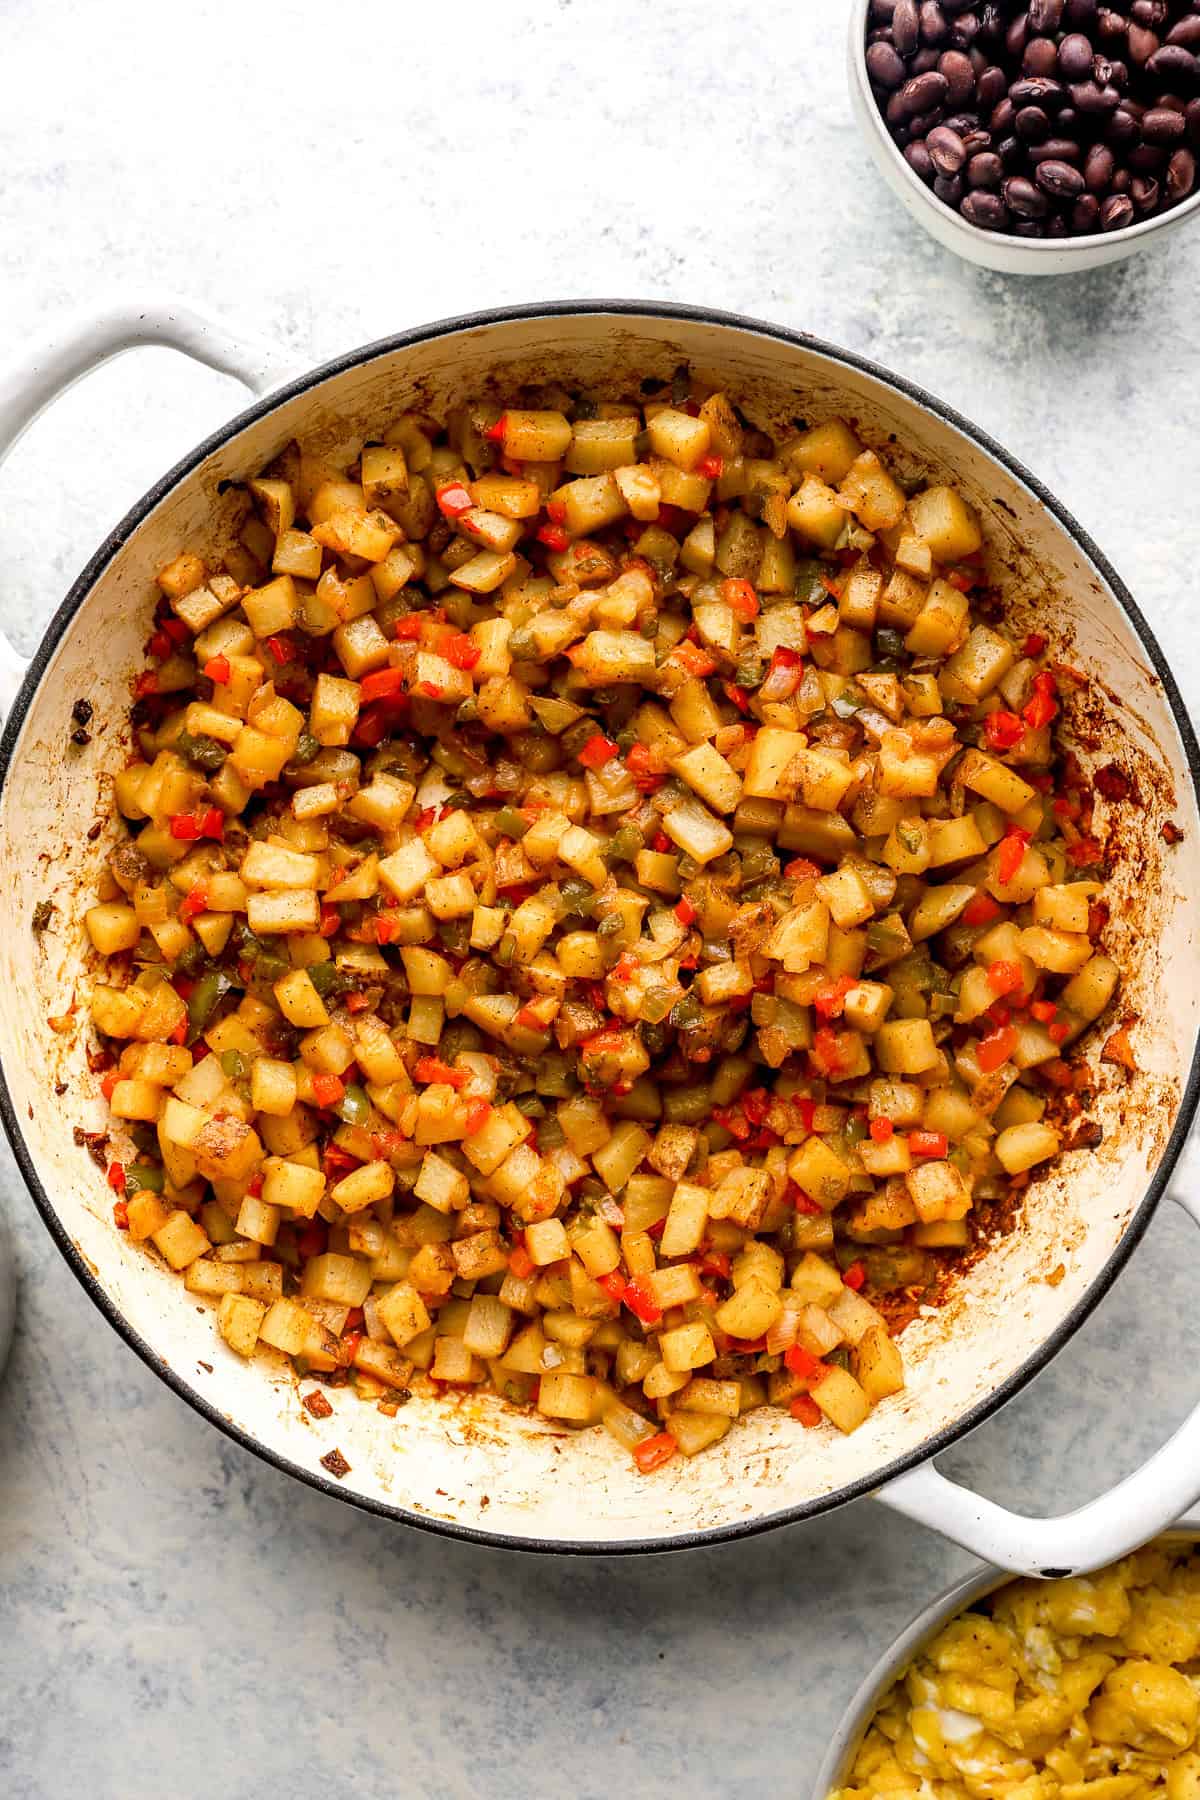
Make the Home Fries
- Sauté the aromatics: Heat oil, butter, or ghee in a skillet over medium heat. Add the garlic, onion, and pepper and cook until the veggies are soft.
- Add the potatoes: Mix in the diced potatoes, then add in the seasonings.
- Bake: Transfer the skillet to the oven and bake. Set aside and cool.
*Alternatively, make my Air Fryer Home Fries
Cook the Meat and Eggs
- Cook the bacon: You can cook the bacon in the oven or in a skillet.
- Scramble the eggs: Crack the eggs into a bowl and whisk. Pour into a nonstick skillet and scramble to your liking.
- Cook the sausage: Heat a skillet over medium heat with ghee or oil. Add the sausage and cook fully. Remove and cool.
Assemble the Breakfast Burritos
- Warm the Tortilla: I find it easier to roll the burritos when the tortillas are warm.
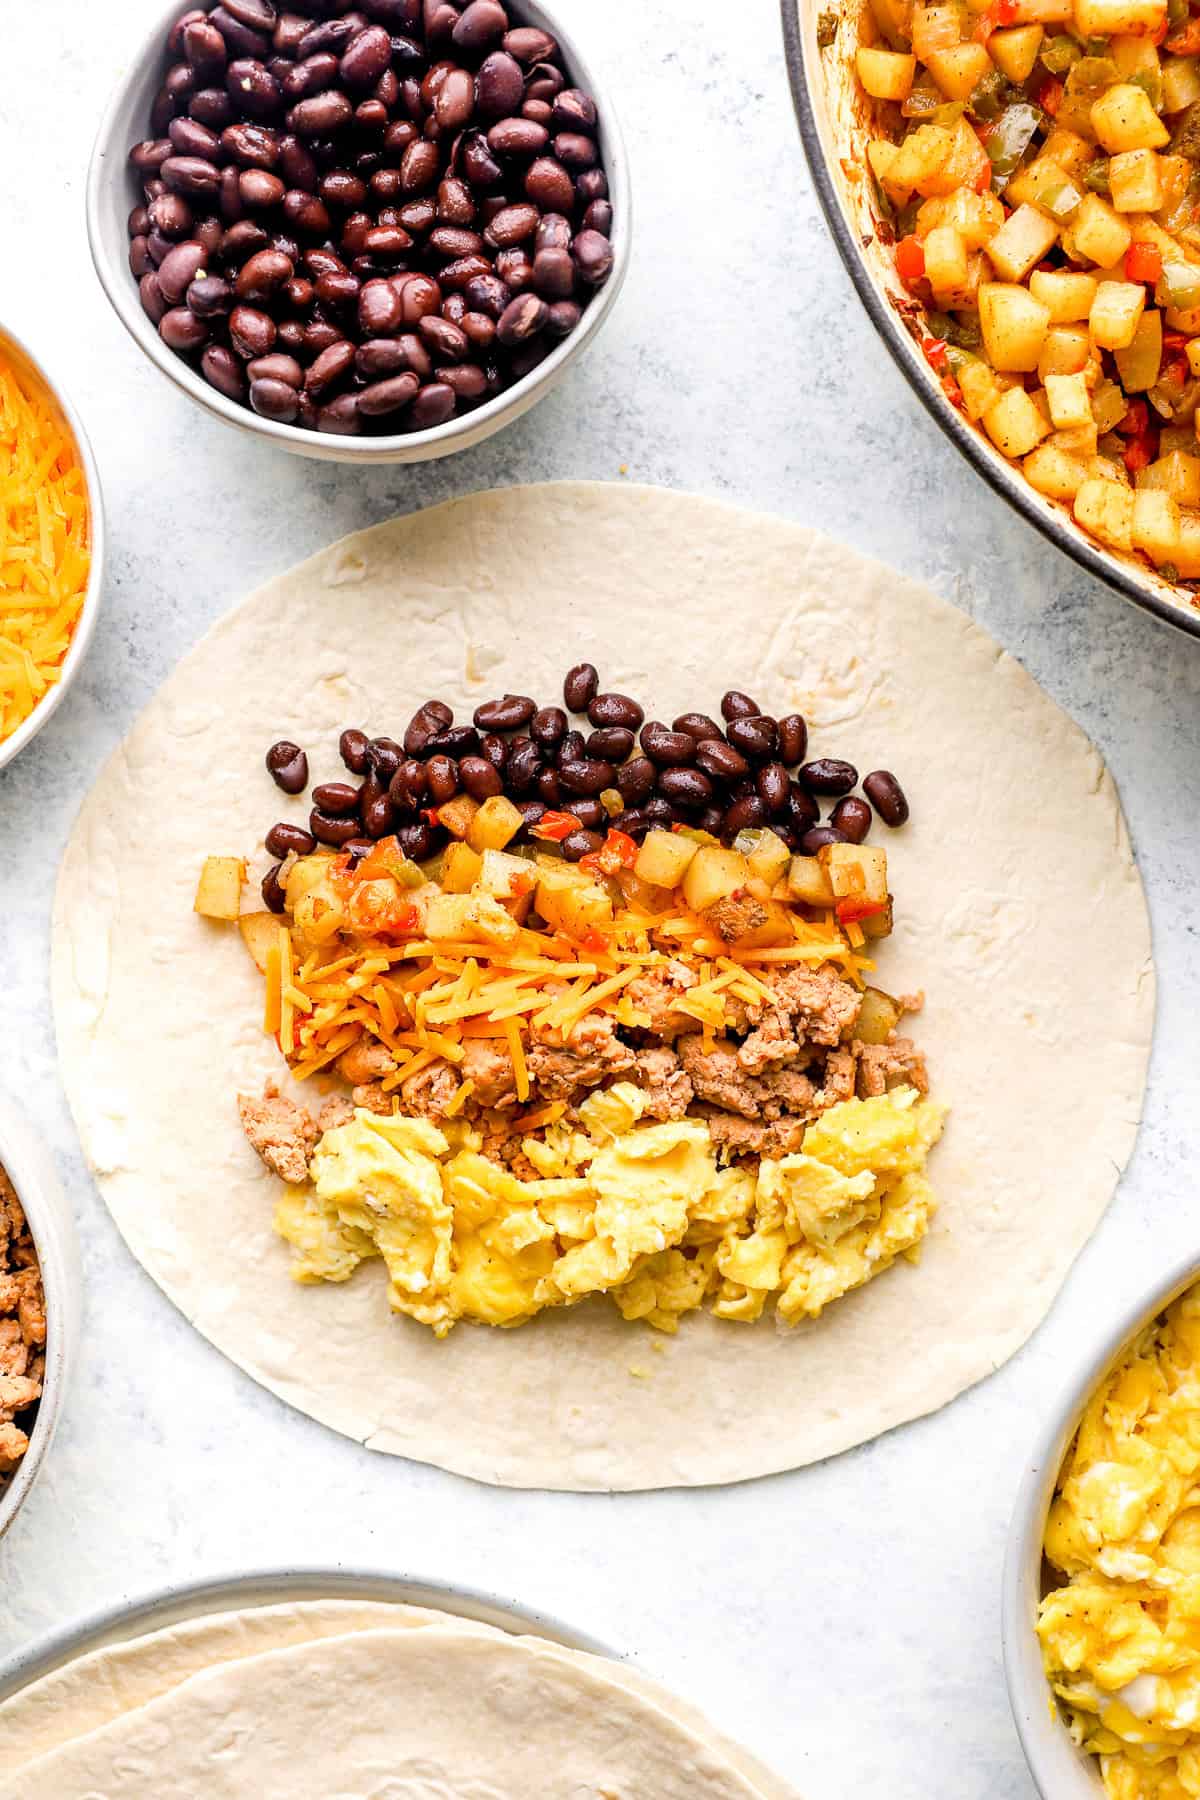
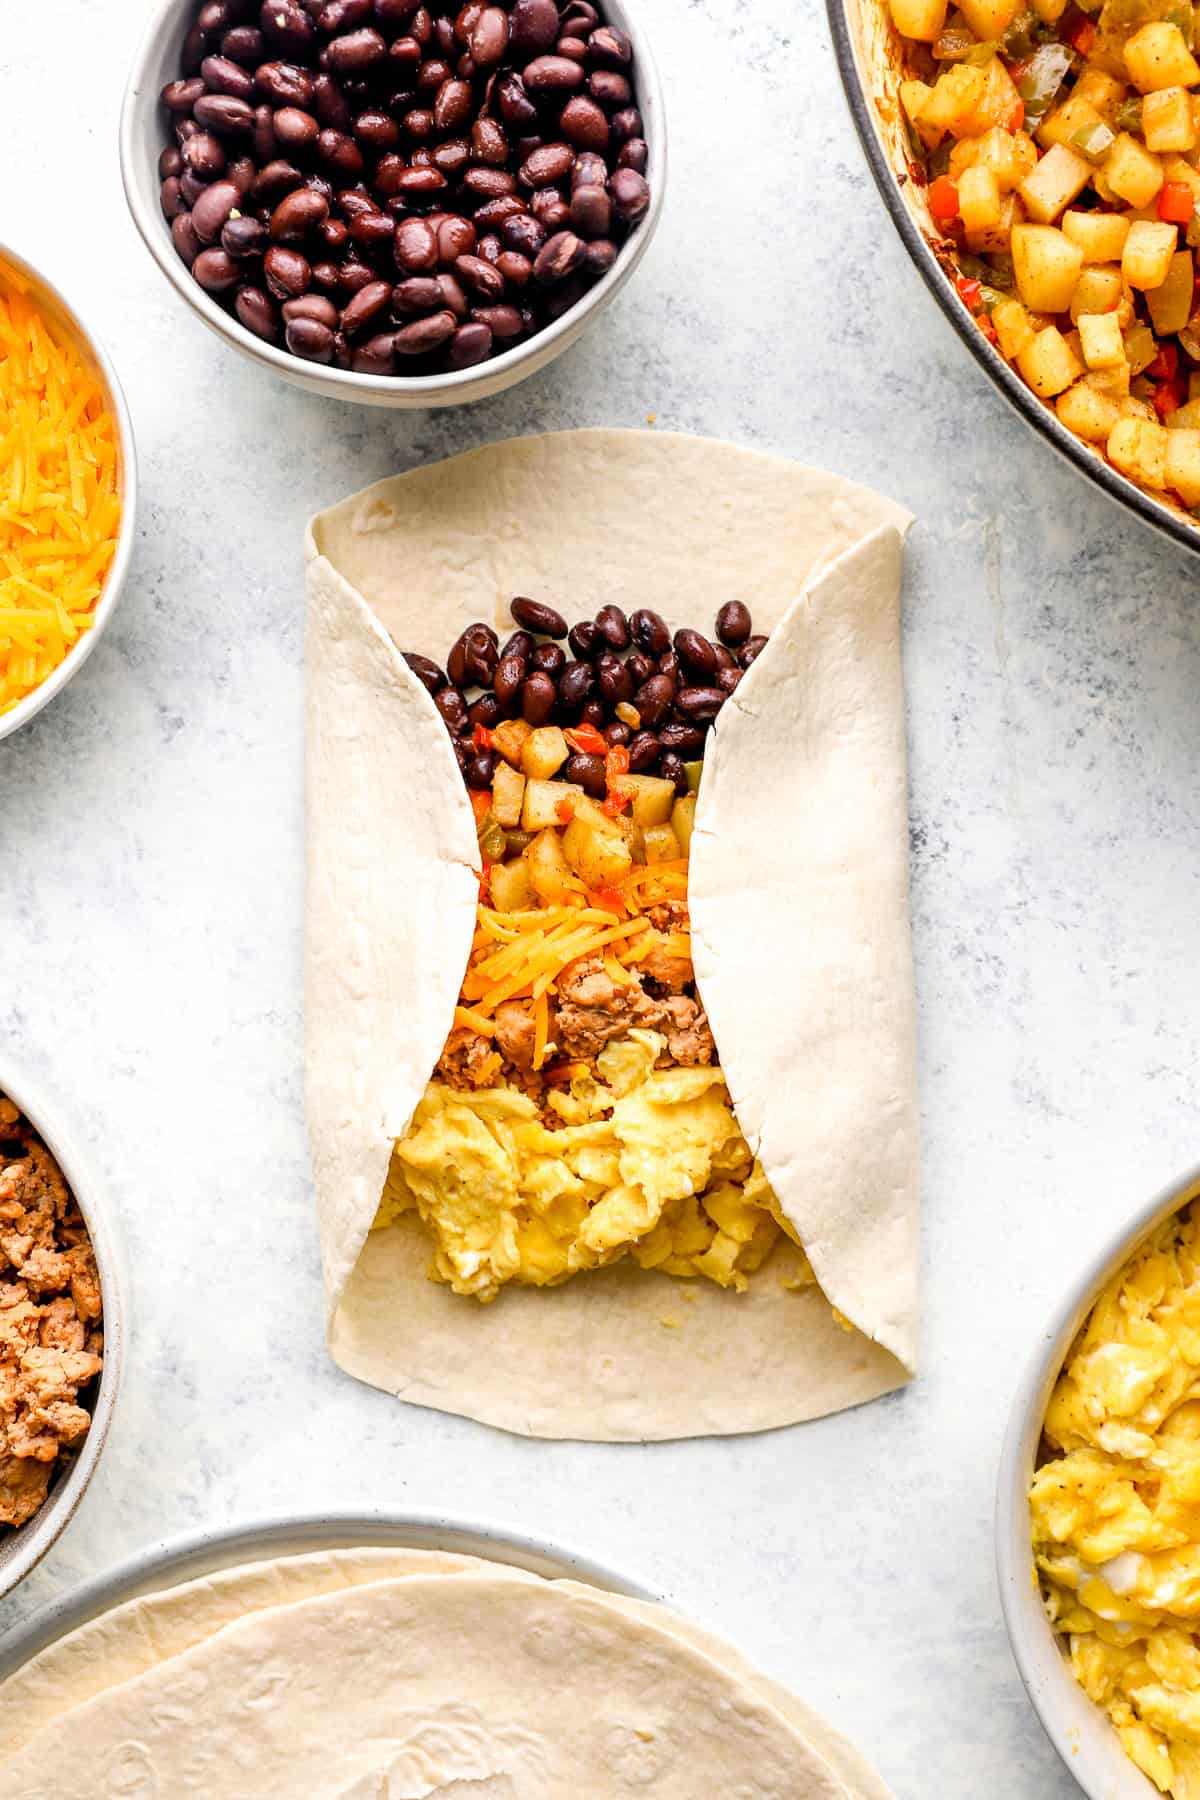
- Assemble the Burritos: Lay out a tortilla, layer on eggs, cooked sausage, veggies, and a sprinkle of cheese. Fold the sides in, then roll up tightly from one end to the other.
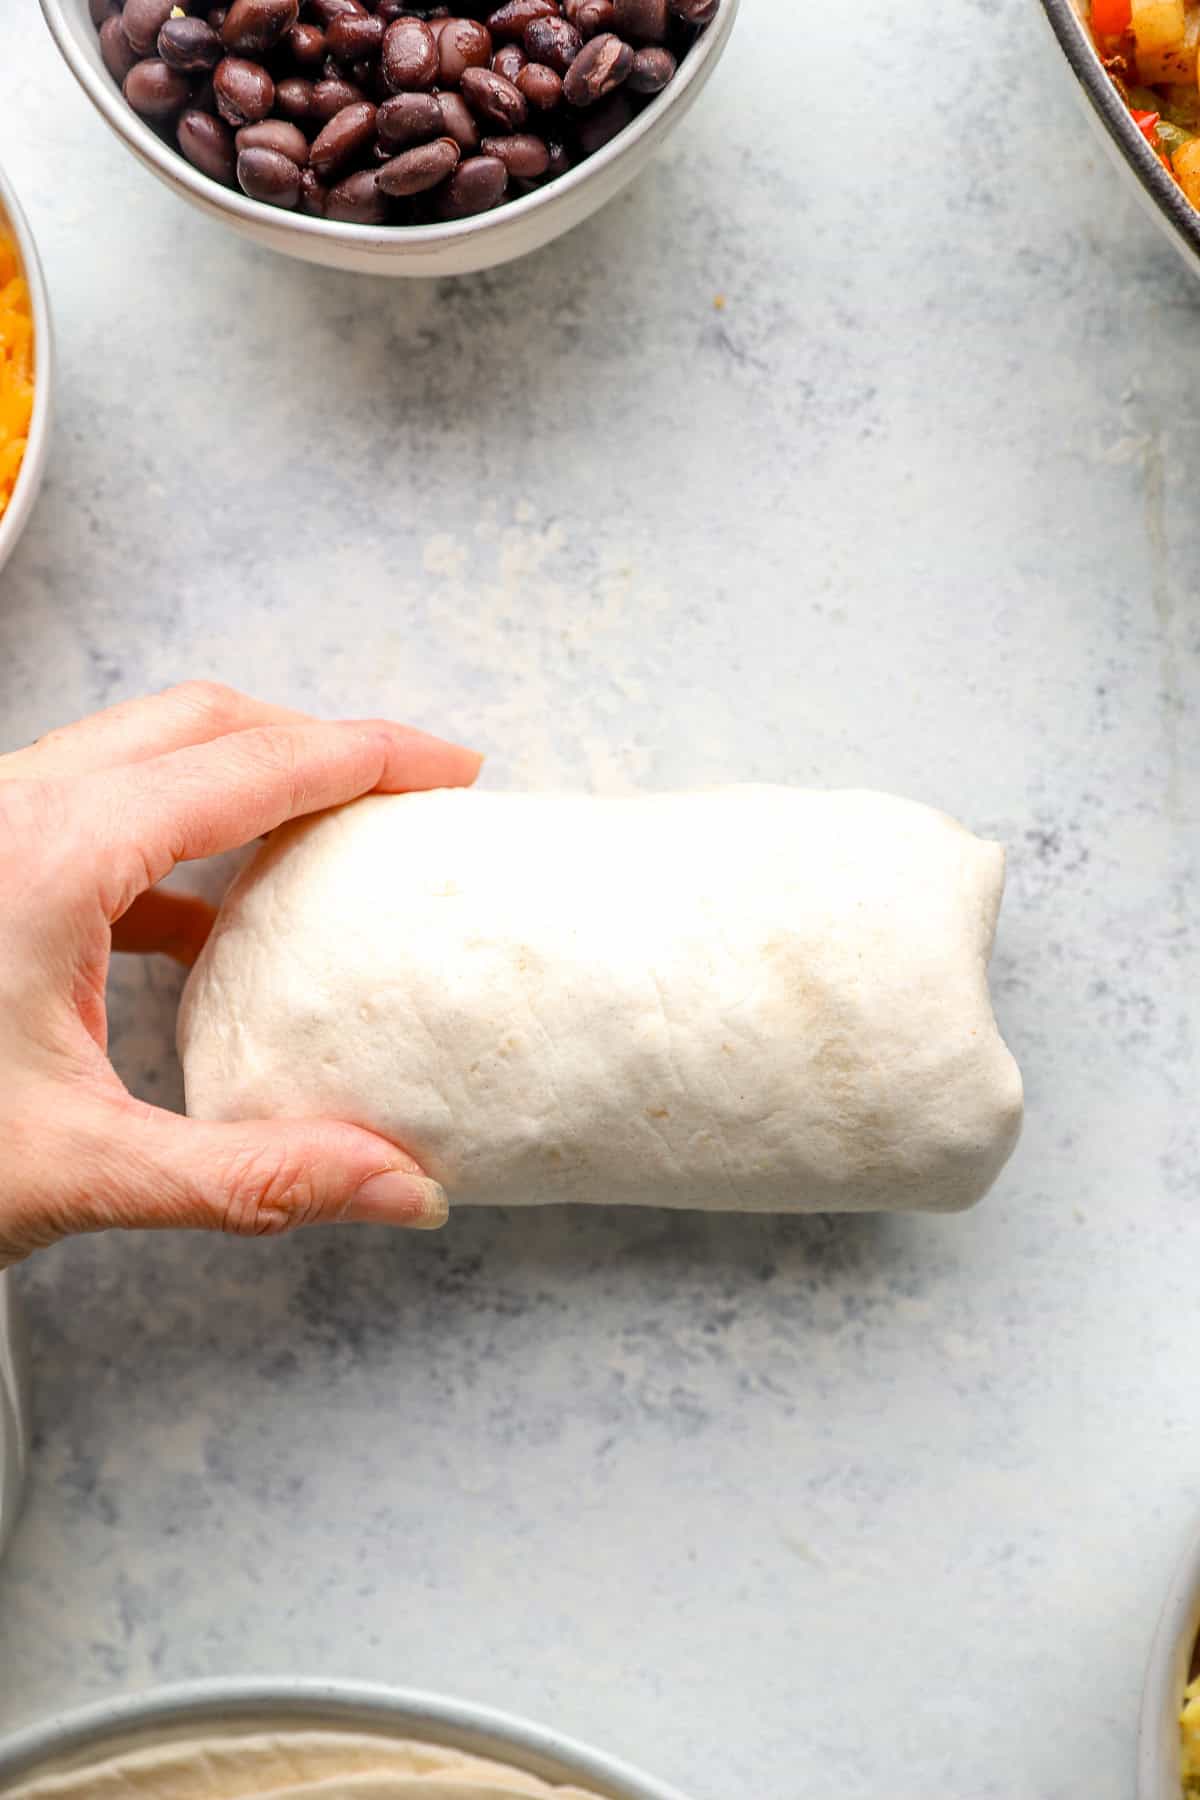
- Fold the burrito: Fold in the sides of the tortilla, then roll it up. Use your fingers to keep all of the filling in as you roll.
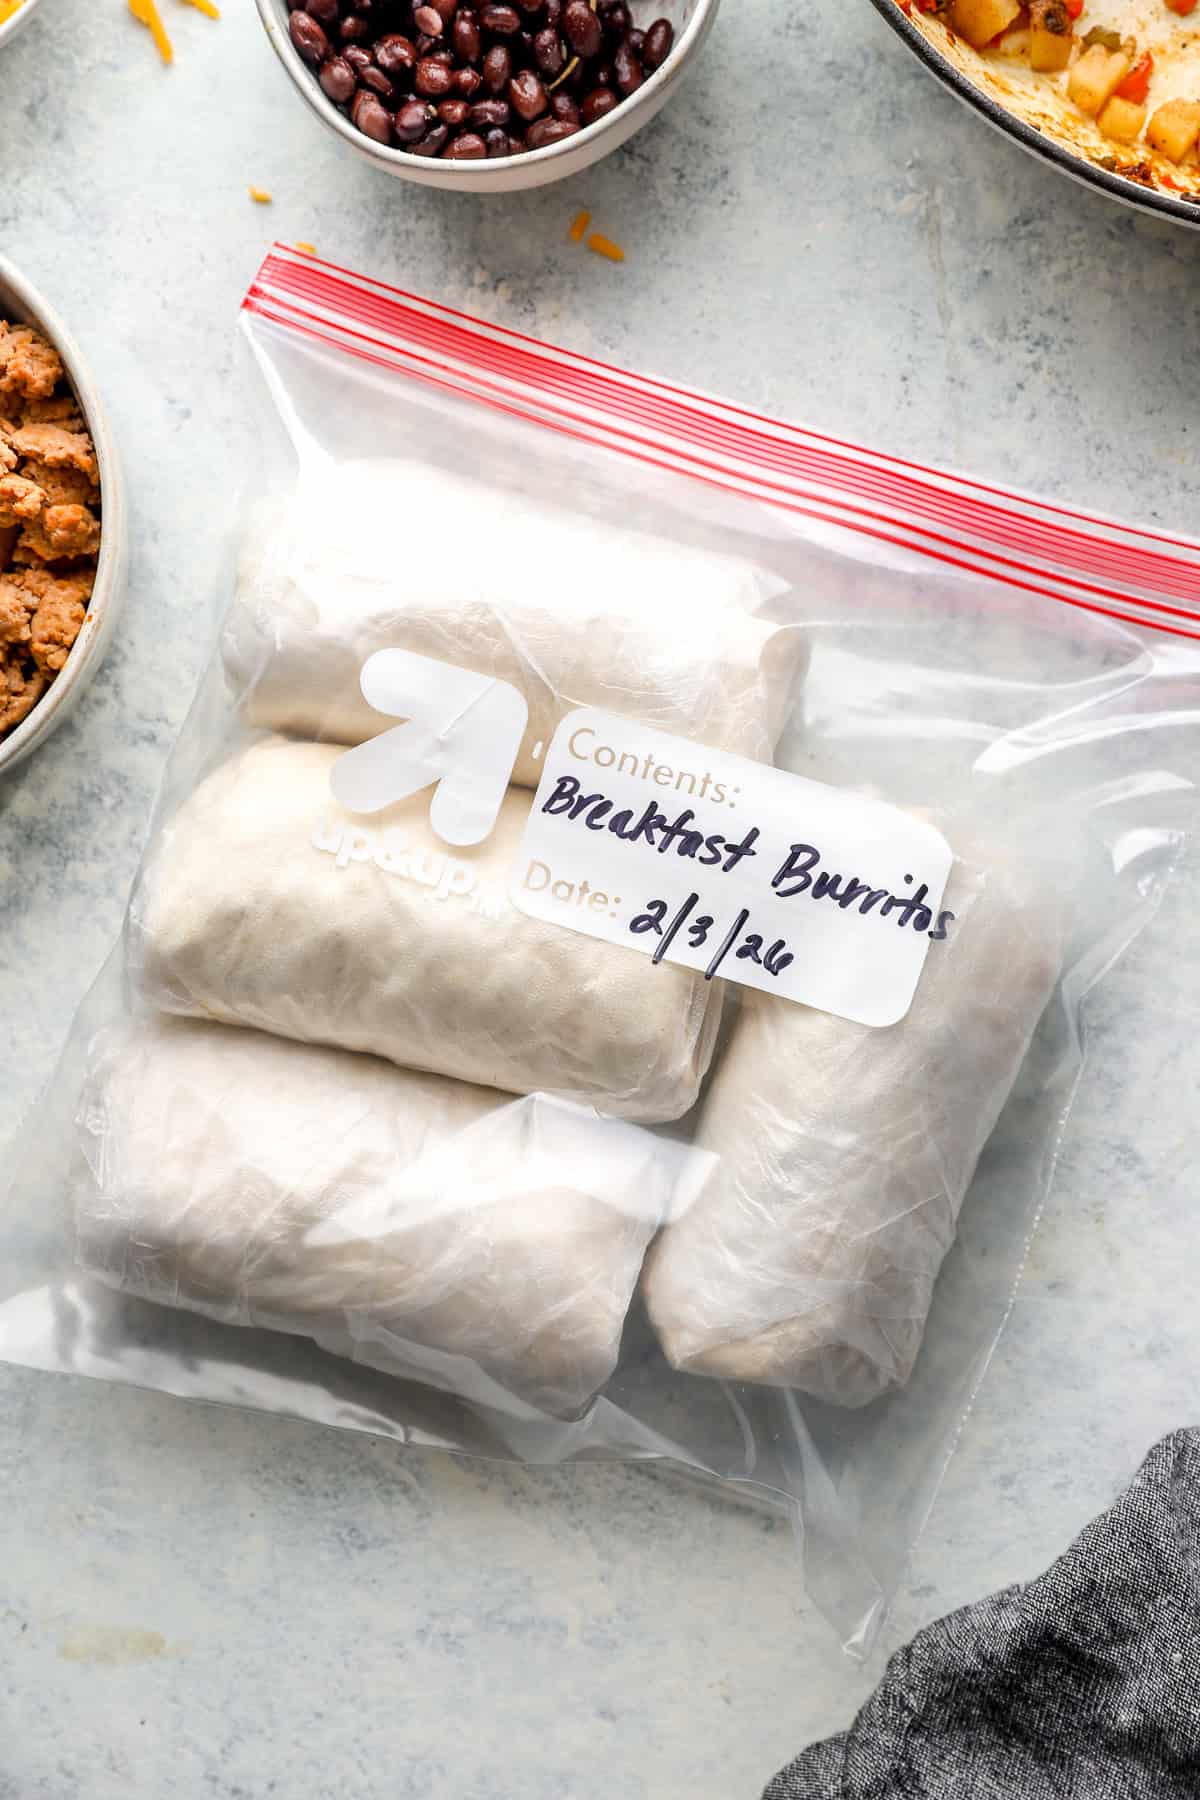
- Wrap for Freezing: Wrap each burrito individually in foil or parchment, then place in a freezer bag or airtight container. Label with date and contents.
- Serve or store: Enjoy these burritos right away, or store them in the fridge or freezer until you’re ready to serve! If storing in the refrigerator, they’ll last 4-5 days
- Freeze: Freeze for up to 2–3 months. When you’re ready to enjoy, reheat from frozen in the microwave or oven (instructions below).
Folding a Burrito
One of the best parts of freezer burritos is that they’re an easy grab-and-go breakfast. However, “grab-and-go” only works if the burrito is folded well. If loosely thrown together, the filling will spill out everywhere.
Here is my method for rolling individual burritos:
- Warm the tortilla for a few seconds in the microwave to soften it (or see above for how to warm on the stove). This makes it easier to work with.
- Add the fillings to the bottom/center of the tortilla.
- Fold in the left and right sides of the tortilla.
- Wrap the tortilla up from the bottom, using your fingers or a spoon to pack the filling in as you go.
- Wet your finger and rub a little bit of water on the very edge of the tortilla to seal it together.
- If wrapping to freeze, lay out your foil, wax paper, or plastic wrap in a diagonal pattern. Fold over the foil, plastic wrap, or wax paper underneath to seal it tightly, then label and store.
Kitchen Tools I Use
Here are the tools I reach for when making these freezer breakfast burritos:
Tips & Tricks for Success
- Don’t overfill the tortillas. A little goes a long way — overstuffing makes rolling harder.
- Cool completely before wrapping. This prevents condensation and freezer ice crystals.
- Double the batch. These freeze so well that making two batches saves time later.
- Mix in extra veggies. Add spinach, mushrooms, or even sweet potatoes for more nutrients.
- Label clearly. Write the date and flavor on the wrap so you always know what’s inside.
Hot Tip: What to Avoid
While there are so many ingredients that are fair game for freezer burritos, there are a couple of ingredients you should avoid:
Watery ingredients. Anything that’s more liquid than solid, like salsa, guacamole, lettuce, and raw tomato, should be avoided in the freezer. Again, they become too watery when thawed, which can cause texture issues. Instead, top your breakfast burrito with them once you’re ready to eat!
Avocado. It just doesn’t freeze well. Instead, serve your reheated burrito with sliced avocado or guacamole!
Dairy. Cheese is fine, but I don’t recommend other dairy ingredients, such as sour cream. They become watery when thawed, which can make your burrito soggy.
Storage + How to Reheat
To Freeze: Wrap individually and place in airtight freezer bags.
To Reheat: See reheating instructions below, microwave for speed or oven for a crispier finish.
Microwave (quickest):
- Keep the burrito wrapped in foil or covered with a damp paper towel.
- Microwave on high 1–2 minutes, flip, then microwave 1–2 more minutes until heated through.
Oven (crispier):
- Unwrap the burrito and place it on a baking sheet.
- Bake at 375°F for 20-30 minutes, flipping halfway through to ensure even heat.
FAQ’s
How long do these burritos last in the freezer?
Stored properly in an airtight bag or wrapped well in foil/parchment, these can last 2–3 months without loss of quality.
Can I make these dairy-free or grain-free?
Yes! Use dairy-free cheese and gluten-free or grain-free tortillas to fit your needs.
What if my burrito gets soggy?
Be sure ingredients cool completely before wrapping. If you overfill or wrap while still warm, steam can make the tortilla soft in spots.
Can I customize flavors?
100%! Try adding salsa, diced tomatoes, spinach, or even swapping breakfast sausage for bacon or turkey sausage.
What are your favorite tortillas?
I use 10-12” tortillas, and they work great! I’ve tested these with grain-free burrito-sized burritos, and they work if heated properly. If gluten isn’t an issue or you’re making them for someone’s freezer, choose whole wheat or regular flour tortillas.
How do you warm your tortillas?
In a skillet: Heat a skillet over medium heat, and warm your tortillas for a few seconds on each side until warm.
In the microwave: Wrap a stack of tortillas in damp paper towels or a damp kitchen towel and microwave for 15-30 seconds, or until warm.
Freezer Tips
Wrap individually. I wrap each burrito up individually in plastic wrap, wax paper, or foil. This makes it easy to grab one or two at a time for reheating.
Roll diagonally. The easiest way for me to wrap up a burrito is to fold it up in the foil at a diagonal. This makes it super easy to wrap and unwrap.
Flash freeze. Freeze the burritos first on a sheet pan until solid before storing them all together.
Store in bags. Once the burritos are frozen, transfer them to a larger ziplock bag for longer storage.
Label. Date the bags so you know when the burritos were made. This makes it so much easier to keep track of how long they’ve been in the freezer.
Serving Suggestions
These breakfast burritos are great on their own as a grab-and-go breakfast, but you can also serve them as a sit-down meal with a side of salsa, guacamole, or any of your favorite breakfast recipes.
Freezer breakfast burritos are also totally not limited to breakfast! Serve them as an easy lunch or weeknight dinner with a side of roasted veggies. The possibilities are endless!
More Breakfast Meal Prep Recipes You’ll Love
Watch The Video:

Breakfast Burrito Fillings:
- 8 eggs
- 3 spicy Italian chicken sausages casing removed
- 1-15- ounce can black beans drained and rinsed
- 1 cup cheddar cheese more as desired
- 8 large tortillas the 10-12″ size work best
Home Fries:
- 2 tablespoons ghee butter, or oil of choice
- 2 cloves garlic minced
- 1 large onion diced small
- 1 green bell pepper diced small
- 1 red bell pepper diced small
- 4 medium russet potatoes scrubbed and diced small
- 1 teaspoon garlic granules
- 1 teaspoon paprika
- 1 teaspoon sea salt
- 1/2 teaspoon black pepper
- Pinch cayenne pepper
-
For the Home Fries: Pre-heat oven to 375°F. Heat the ghee in a large ovenproof skillet over medium heat until hot, about 5 minutes. Add the minced garlic, diced onion, and diced pepper to the skillet. Cook stirring often, until the vegetables are slightly soft, about 5 minutes. Add in the potatoes and cook, stirring often for about 10 minutes. Add more ghee here if the potatoes are sticking to the pan. Add in garlic, paprika, salt, pepper and cayenne and mix until well combined. Place in the oven and bake for 25 minutes or until the potatoes are soft, tender and golden brown. Let cool slightly. Place in a bowl and set aside for assembly. Alternatively, whip up my Air Fryer Home Fries!
-
Cook Eggs: Crack the eggs into a bowl and whisk. Season with a pinch of salt and pepper. In a hot greased skillet, cook the eggs over medium heat until fluffy and cooked through, but don’t over cook! Set aside.
-
Cook Meat: For the Italian sausage, heat a medium skillet with ghee or oil of choice. Add the sausage to the pan and cook until fully cooked through and no pink remains. Once cooked through, remove from heat and let cool slightly. Place sausage in a food processor and pulse once or twice, or chop finely.
-
Black Beans: Drain and rinse black beans and set aside.
-
To Assemble: Warm tortilla. Lay a tortilla flat. Place 2 tablespoons home fries, 2 tablespoons ssausage, ¼ cup eggs, 2 tablespoons black beans in the center of the tortilla. Fold in the sides and roll, making sure to use your fingers to keep in all of the filling while rolling.
-
To Eat and Store: Either serve right away or wrap individually in plastic wrap or aluminum foil tightly. Let freeze individually on a sheet tray, and once frozen place in a labeled bag for long term storage, up to 3 months.
-
To Reheat from Frozen: Unwrap wrapping and place on a plate with the seam side down. Reheat in a microwave for 3-5 minutes until heated through, or place in a oven, wrapped in foil, at 375 and bake for 30 minutes, or until heated through.
Calories: 576kcalCarbohydrates: 60gProtein: 30gFat: 24gSaturated Fat: 8gCholesterol: 128mgSodium: 850mgFiber: 15gSugar: 5g
Source link
#FreezerFriendly #Breakfast #Burritos #Lexis #Clean #Kitchen