- Your cart is empty
- Continue shopping
-
Maven
- Posted on
- Categories:Home
- 0 comments

Sometimes I get on a major bread-baking kick. A few years ago, I first shared my mom’s No Knead Seeded Honey Oat Artisan Bread, and it reminded me of my other all-time favorite bread recipes that I shared even years before that.
The inclination to bake my own sandwich bread came after visiting my Grandma years ago and watching her crank out her homemade bread quicker than Martha Stewart. Not only was the bread SO much better than the store-bought version, but it was a creative, hands-on activity that I felt I could incorporate into an afternoon. Plus, baking homemade bread just makes me proud, you know?
So here we are! I had to re-share a classic: my soft, homemade healthy sandwich bread recipe made with whole wheat flour, nutritious seeds, oats, and naturally sweetened with just a touch of honey. We use this sandwich bread recipe for sandwiches, garlic bread, French toast, avocado toast — the list goes on! And now you can make it, too.

Ingredients for healthy sandwich bread
This lovely, healthy bread recipe uses simple ingredients to create a nutritious, perfectly fluffy bread you’ll seriously make again and again. Here’s everything you’ll need to make it:
- Bread flour: to help keep this seedy sandwich bread soft, fluffy, and airy, we’re using bread flour, which has a higher protein level to help lighten the bread’s texture. The higher amounts of protein help to produce more gluten, which gives bread its chewiness, texture, and traditional airy holes.
- White whole wheat flour: I wanted this sandwich bread recipe to include whole grains, so I opted for a little white whole wheat flour (or whole wheat pastry flour). You can also use regular whole wheat flour.
- Flaxseed meal: not only does flaxseed meal help to absorb some liquid in this recipe, but it also adds a healthy dose of fiber and protein to the bread. Flaxseed meal is critical; please do not skip it.
- Salt: bread made without salt tastes very plain, and in addition, salt also helps to control yeast in bread recipes, so don’t skip it.
- Seeds: this recipe calls for mixed seeds, which not only enhance the flavor of the bread but also give it a delectable, slight crunch, especially when toasted! I use a mix of sunflower seeds, toasted sesame seeds, and hemp or chia seeds.
- Water & milk: you’ll need both water AND milk as the liquid in this bread recipe. I’ve used both regular milk and almond milk with success. You just need to make sure that after you combine the milk and water, you microwave the mixture to 115 degrees (the optimal temperature for bread making). If you don’t have a thermometer to use, the best gauge is your finger. The mixture should feel like warm bath water when you test it with your finger.
- Oats: this healthy sandwich bread recipe calls for whole grain rolled oats. It adds a nice, hearty texture to the bread.
- Butter: fat helps to give the bread a finer crumb and better texture.
- Honey: we’re using a little honey to give the bread a very slight sweetness and to help activate the yeast once it’s mixed into the dough.
- Yeast: use quick-rise or instant yeast in this sandwich bread recipe to help the bread rise faster. You can also use active dry yeast, but the bread may take a slightly longer time to rise.
- For topping: I like to brush the bread with heavy cream (or milk) instead of an egg wash, and then sprinkle on a few extra oats to make it look nice and pretty.

Can I make it gluten-free, vegan, or dairy-free?
I cannot recommend a gluten-free swap for the flours in this recipe. Sorry!
To make it vegan and/or dairy-free: Simply use brown sugar instead of honey, almond milk for the regular milk, vegan butter, and dairy-free milk to brush the bread before baking.
How to measure flour
I HIGHLY recommend using a kitchen scale to measure your flour (and the rest of your ingredients!) This will ensure that your bread will turn out perfectly, because I test my baking recipes multiple times by weighing the ingredients.
If you have to use cup measurements instead, be sure to check out my tutorial here on how to accurately measure flour without a scale, and remember to watch the video for full instructions!

All about yeast: which to use & how to activate
I get this question all the time in my cinnamon roll recipe and other yeasted bread recipes. First, it’s important to know that there are two types of yeast to choose from:
- The first is active dry yeast, which must be dissolved in liquid, or also what’s known as being “proofed” before it’s added to the rest of the dough ingredients.
- The second type of yeast is instant yeast, also known as quick rise yeast (this is the brand I use and love!). That’s what we are using for this seedy healthy sandwich bread recipe. It can be added to the dough without proofing.
You can use either type of yeast in this recipe; just know that if you use active dry yeast, it may take the bread longer to rise.

Tips for baking homemade sandwich bread
- Watch the second rise. The bread should not come more than 1 inch above the brim of the pan during the second rise. The weather, how much you kneaded the dough, and the temperature in your home can affect how quickly your dough will rise. So just make sure you’re keeping a close eye on it.
- Check for doneness. Bread is done when the internal temperature reaches 190 degrees F. This bread is always perfectly done for me between 35-40 minutes. It should be golden brown on top and make a hollow sound when tapped.
- Let it cool. Wait at least 2 hours before cutting into the bread. I know it can be very tempting, but if you cut into it sooner, it will most likely alter and change the texture.

How to store homemade bread
- To store: store this homemade sandwich bread on the counter. Once the bread is completely cool, wrap it in plastic wrap and store it at room temperature. If the weather is hot or humid, it’s best to store the bread in the refrigerator.
- To freeze the bread: wrap it in plastic wrap, then seal it in a reusable bag, making sure to get all the air out of the bag. You can also wrap the bread in plastic and then wrap it tightly in foil. Bread should last 3 months in the freezer. Once ready to serve, unwrap the bread and thaw at room temperature.

Tools you’ll need
Get all of my recommended kitchen tools here!
More bread recipes you might like
Get all of my bread recipes here!
I hope you LOVE this healthy bread recipe as much as we have enjoyed making it for you! Please leave a comment and rate the recipe if you make it. Enjoy, xo!
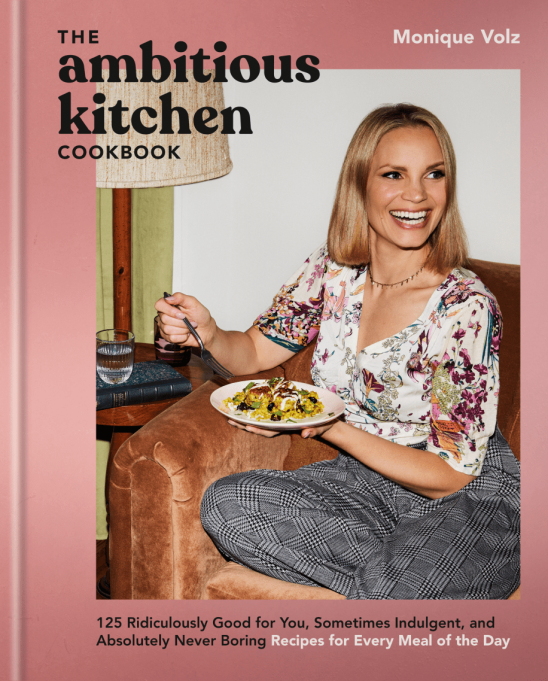
The
Ambitious Kitchen
Cookbook
125 Ridiculously Good For You, Sometimes Indulgent, and Absolutely Never Boring Recipes for Every Meal of the Day
Seedy Honey Whole Wheat Sandwich Bread

This homemade healthy sandwich bread recipe is soft and made with simple ingredients like whole wheat flour, seeds, oats, flaxseed meal, and just a touch of honey. You’ll love making this for sandwiches, your morning toast, and so much more!
Ingredients
- Dry ingredients
- 2 ¼ cups (270 grams) bread flour
- 1 cup (113 grams) white whole wheat flour (or whole wheat flour)
- 1 tablespoon flaxseed meal
- 1 ½ teaspoon kosher salt
- 4 tablespoons mixed seeds of choice (I did 2 tbsp sunflower seeds, 1 tbsp toasted sesame seeds, 1 tbsp hemp hearts or chia seeds)
- Wet ingredients
- 1 cup (240 grams) filtered water
- ¼ cup (60 grams) milk of choice (I used whole milk)
- ½ cup (48 grams) rolled oats
- 3 tablespoons melted or softened butter (either is fine)
- 2 tablespoons honey
- 2 ¼ teaspoons instant yeast (one ¼-ounce package)
- For topping
- 2 tablespoons heavy cream or milk, for brushing
- 1 tablespoon oats
Instructions
-
Prepare the dry ingredients: In a large bowl, whisk together the bread flour, white whole wheat flour, flaxseed meal, salt, and seeds.
-
In a large microwave-safe bowl, microwave the water and milk until slightly warmed than bath water until it reaches 115 degrees F, about 1 minute. In the bowl of a stand mixer fitted with the paddle attachment, add the warm water and milk mixture, then add in the oats, butter and honey. Mix on medium speed until well combined, about 30 seconds. Sprinkle the yeast over the top and allow the mixture to sit for 5 minutes.
-
Add the dry ingredients and mix with a wooden spoon until just incorporated, then fit the mixer with the dough hook attachment and knead the dough on medium-low speed for 8 to 10 minutes. The dough will be slightly sticky, but if it is sticking to the sides of the bowl after kneading for a few minutes, add 1 to 2 tablespoons of flour.
-
Cover the bowl with plastic wrap and a towel and let it stand in a warm place until doubled in size, 1 ½ hours. This may take more or less time depending on the weather or temperature in your home. Tip: If your kitchen is cold, I like to preheat my oven to the lowest temperature possible (100 to 130 degrees F). Once preheated, turn the oven off, place the bowl of dough in the oven, and keep the door slightly ajar – this will help the dough to rise more quickly. The dough is done rising when you press a finger into it and the indentation stays or springs back very slowly.
-
Grease an 8 ½ x 4 ½ inch loaf pan or an 8×4 inch loaf pan with nonstick cooking spray. (This size of pan is best for this bread, a 9×5 inch tends to be too big.)
-
Lightly flour a clean surface. Turn the dough out onto the floured surface then use your hands to pat the dough down into an 8×12-inch rectangle. Roll the dough into an 8-inch long log, tucking the ends underneath and sealing the bottom by pinching the ends together. Place in a prepared pan. Cover with a towel and allow the dough to rise again for 45 minutes to 1 hour or until 1-inch above the brim of the pan.
-
While the dough rises, place a rack in the middle of your oven, then preheat your oven to 350 degrees F.
-
Once bread is ready and has risen, gently brush the top of the loaf with milk, then sprinkle with oats. Bake for 35 to 40 minutes or until bread is golden brown on top and makes a hollow sound when tapped. A thermometer inserted into the loaf’s center should read 190 degrees F. Remove the bread from the oven, allow it to cool for 5 minutes, then turn bread out onto a wire rack. Allow bread to cool completely before slicing. Store the bread at room temperature well-covered for up to 5 days or freeze for up to 3 months.
Recipe Notes
Bread is excellent toasted with butter, peanut butter, garlic butter or mashed avocado. It’s great for grilling or for sandwiches too!
See the full post for tips, tricks and ways to customize your bread!
See the full post for tips, tricks and ways to customize your bread!
Nutrition
Serving: 1slice (based on 15)Calories: 156calCarbohydrates: 24.2gProtein: 4.1gFat: 5.1gSaturated Fat: 2.2gFiber: 2.1gSugar: 2.8g
Recipe by: Monique Volz // Ambitious Kitchen | Photography by: Eat Love Eats
This post was originally published on April 7th, 2019, republished on February 20th, 2023, and updated with a new recipe on January 13th, 2026.